
If you have an Mac equipped with the powerful M-series processors and are eager to install Windows in it then you’ve found the right spot. Apple’s M-series Macs provide an entirely new set of options for users, with improved gaming experience, enhanced performance, more efficient sharing options, upgraded support for USB 3.0 support, improved control of disk space, security for network configurations and the ability of booting macOS Ventura VM to Recovery. In this tutorial we’ll show you the steps required to download Windows in your M series Mac with BootCamp.
Improved Gaming Experience

One of the main reasons people run Windows for their M-series Mac is to enjoy an improved gaming experience. Many of the most popular games are designed for Windows as well, and by enabling using dual booting on you Mac with Windows you will be able to access an extensive library of games that aren’t accessible on macOS.
Optimized to work with newer versions of the Latest Apple Computers
Windows with M-series Macs is not only about gaming, it’s about optimizing your system for a variety of jobs. The M-series chips are extremely robust and Windows makes the most of this hardware to offer amazing performance in tasks such as the editing of videos, rendering 3D and much more.
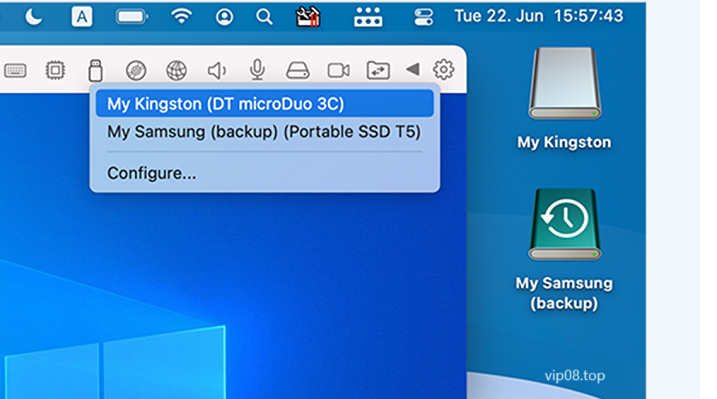
Simplified Sharing Options
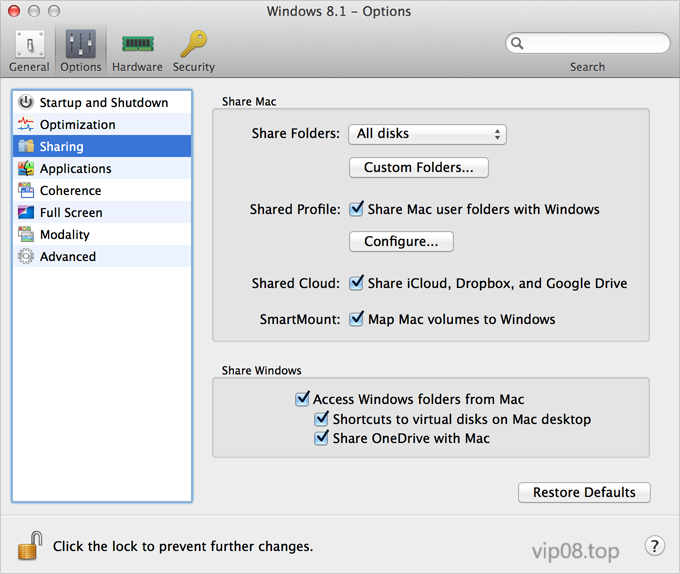
Operating Windows in conjunction with your Mac lets you effortlessly transfer data and files between both operating systems. If you’re looking to transfer images, documents or other files you’ll notice it easy and fast.
Improved USB 3.0 Support
M-series Macs have USB 3.0 ports as well as Windows has the best support for these fast connections. No matter if the device you are connecting to is external or to other peripherals, you will be able to benefit from the improved connectivity of USB 3.0 capabilities that Windows offers.
Better Disk Space Control

If installing Windows onto your M series Mac You have greater control over the allocation of disk space. You can set the amount of storage space Windows will require, and ensure that you have enough space for all your programs and data on each operating system.
Network Protection of Configuration

Security is a must when you are using different operating systems on one machine. Windows has a solid protection against network configuration and ensures the internet is safe and stable while switching from macOS or Windows.
Boot MacOS Ventura VM to Recovery
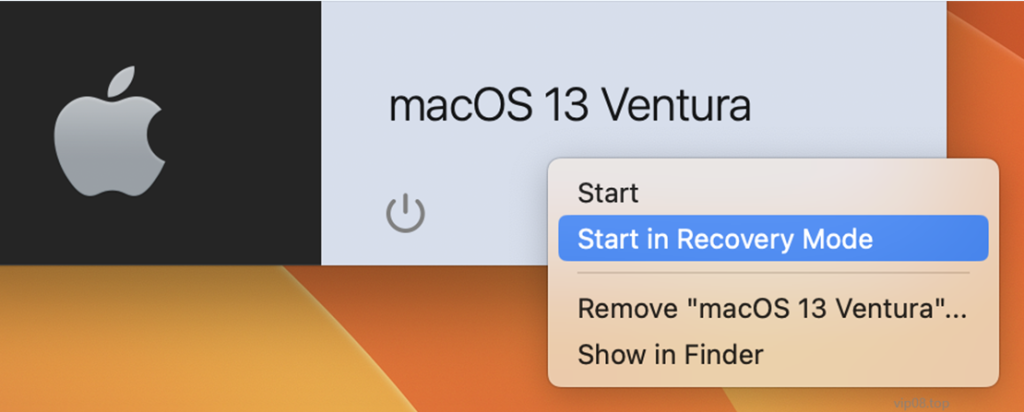
The ability to run macOS Ventura in a virtual machine (VM) on your M-series Mac permits you to use macOS Recovery tools, without restarting your system. This can be extremely helpful in tackling maintenance or troubleshooting tasks as it will not require you to reboot your system constantly.
After we’ve laid out some advantages that come with operating Windows in your M-series Mac Let’s get into the process of installing:
Step 1: Review the requirements of your system.
Before starting, you must make sure that your M-series Mac is compatible with the system requirements to run Windows. You’ll need enough storage and a compatible version of Windows as well as an USB drive with at least 16GB of storage.
Step 2: Download Windows
Get the Windows ISO file from the official Microsoft site or make use of an Windows installation disc, if you have one.
Step 3: Step 3: Boot Camp Assistant
On your Mac, launch Boot Camp Assistant on your Mac. This application is positioned within the Utilities folder, which is placed inside your application folder.
Step 4: Make Partitions
Boot Camp Assistant can guide you through the steps to create an Windows partition on the hard drive of your Mac. Make sure you have enough space available to install Windows according to your requirements.
Step 5 Install Windows
Follow the instructions on the screen to install Windows. You’ll be asked to choose your Windows ISO file you downloaded earlier.
Step 6: Configure Windows
After Windows installs, you can follow the installation procedure to set your language or region as well as other preferences.
Step 7: Install Drivers
Once Windows is fully operational it’s time to install the required drivers. Boot Camp Assistant can help in this process.
Step 8: Experience Windows with Your M-series Mac
That’s it! Now you are running Windows operating on the M series Mac. Take advantage of all the advantages that it provides from gaming to improved performance.
In the end the installation of Windows in your M-series Mac can open many possibilities and make your computer experience more enjoyable. If you’re a gamer an artistic professional or simply looking for a way to use Windows applications it’s simple and worthwhile. You can enjoy the most powerful of both on your M-series’s powerhouse Mac!
FAQs
How to open Mac apps over Windows using Parallels?
Opening Mac Apps in Parallels: To open Mac apps in Parallels, use “Coherence Mode,” which integrates Windows and Mac environments, allowing you to access Mac apps from the Dock while running Windows.
Is there an easy way to turn a Mac into a PC or vice versa?
Turning Mac into a PC or Vice Versa: Physically transforming a Mac into a PC or vice versa isn’t feasible. However, you can run both macOS and Windows on a Mac using virtualization software like Parallels Desktop.
Can you run Windows on the new M1 Macs?
Running Windows on M1 Macs: Yes, you can run Windows on the new M1 Macs using virtualization solutions like Parallels Desktop and CrossOver, though it may involve workarounds and isn’t officially supported.
What is the best program to run Windows on a Mac?
Best Program to Run Windows on a Mac: Parallels Desktop, VMware Fusion, and Boot Camp are popular choices. Parallels Desktop is often favored for its user-friendly interface and strong performance.